
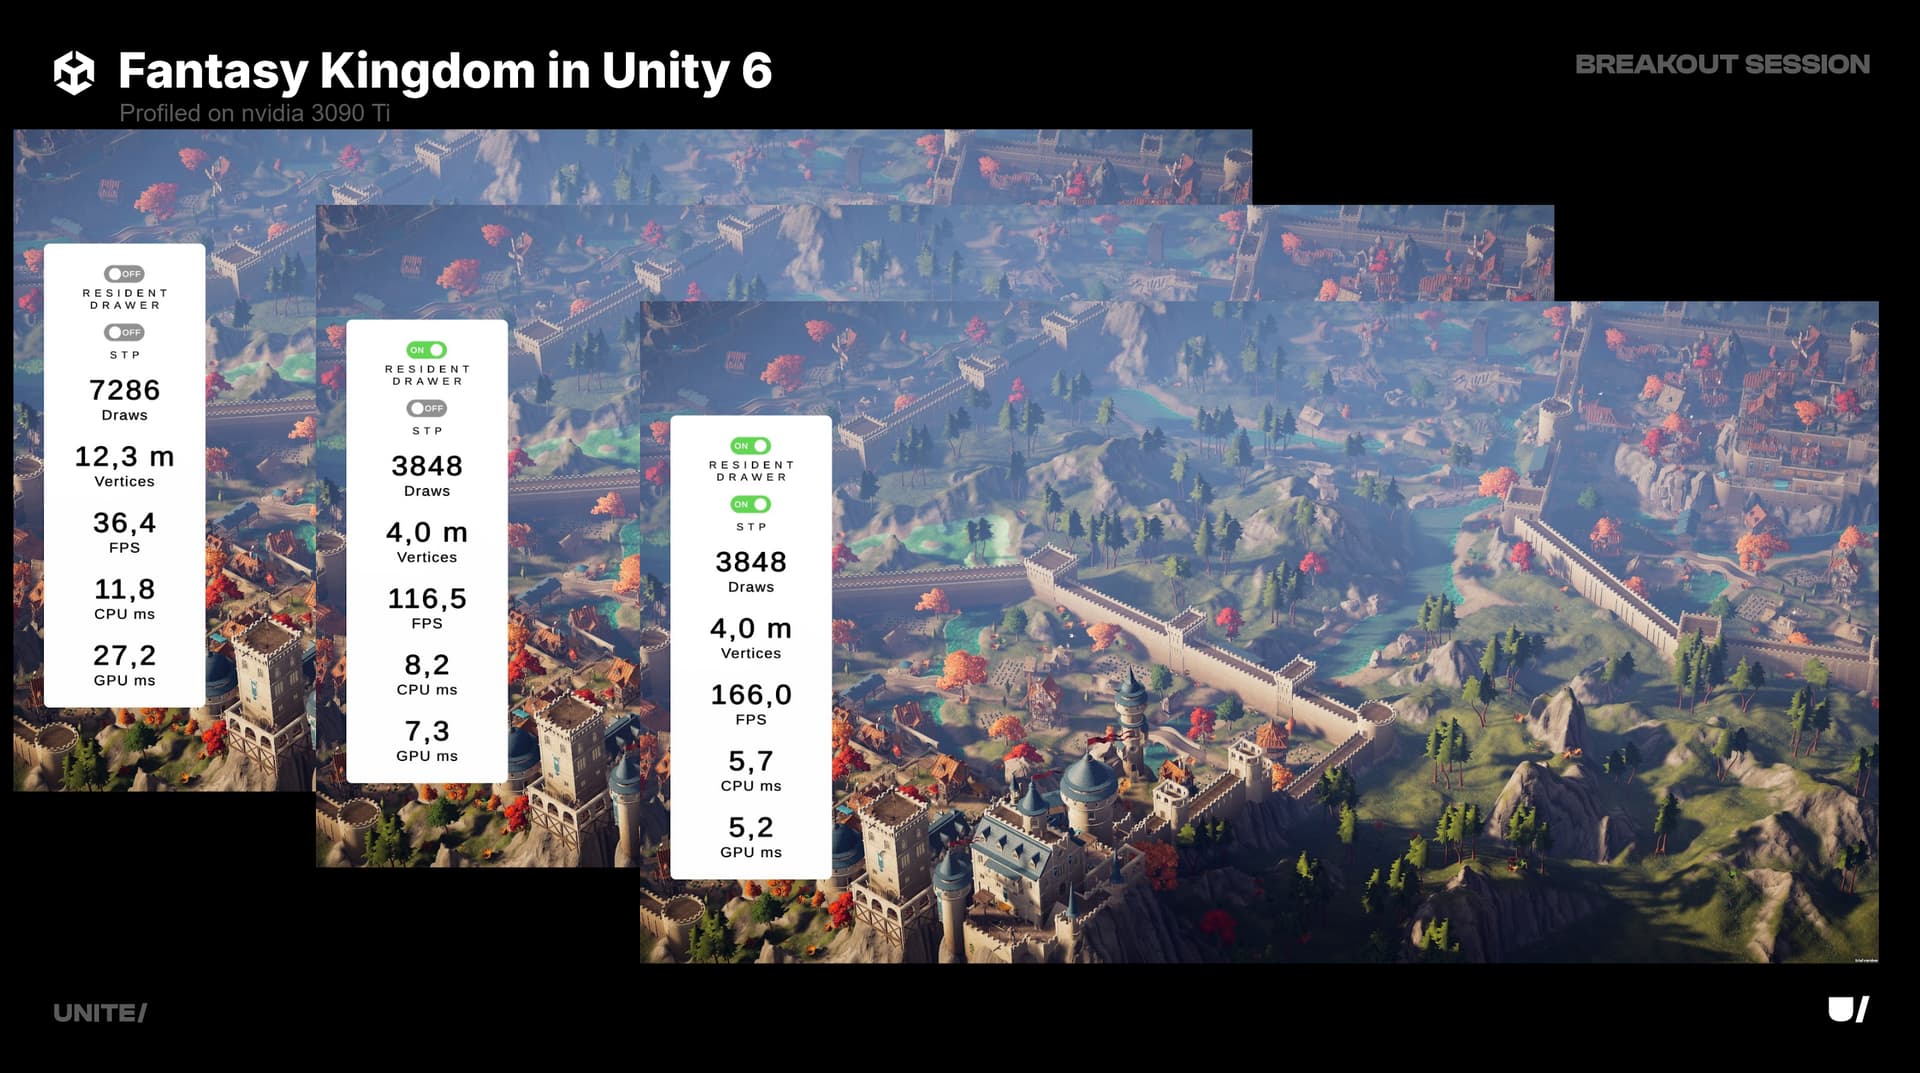
Unity 6’s GPU Resident Drawer can reduce draw calls by up to 50%. But exactly how does it do that?
This post digs into the internals of GPU Resident Drawer — how it works under the hood, where it helps, and where it doesn’t. “Just turn it on and it gets faster” isn’t enough. Understanding the mechanism is what lets you use it properly.
Table of Contents
- Bottleneck in Traditional Rendering
- BatchRendererGroup — Foundation
- GPU Instancing and Indirect Rendering
- GPU Occlusion Culling
- DOTS Instancing — Shader Requirement
- Performance Numbers
- How to Enable (URP)
- When It Doesn’t Apply
- Debugging
- Conclusion
First, Let’s Identify the Bottleneck in Traditional Rendering
To appreciate GPU Resident Drawer, you need to understand why traditional CPU-based rendering slows down.
Unity’s classic rendering pipeline looks roughly like this:
1. CPU: Traverse all Renderers in the scene, make culling decisions
2. CPU: Build draw call list (applying SRP Batcher, Static Batching)
3. CPU → GPU: Deliver draw commands one by one
4. GPU: Execute rendering
Step 3 is the problem. Every frame, the CPU spends significant time telling the GPU “draw this, draw that” — and with thousands or tens of thousands of objects in a scene, this communication itself becomes the bottleneck. The GPU has already finished its previous work and is sitting idle while the CPU is still preparing the next batch of commands.
BatchRendererGroup — The Foundation of GPU Resident Drawer
GPU Resident Drawer is built on top of the BatchRendererGroup (BRG) API. BRG was originally a low-level API used internally by the DOTS (Entities) graphics package. Unity 6 extends it to work automatically with regular GameObjects — that’s GPU Resident Drawer.
The central idea behind BRG is shifting control of draw commands from the CPU to the GPU.
In the old approach, the CPU would tell the GPU: “Draw object A at position X.” With BRG, the CPU uploads instance data (position, rotation, scale, material properties, etc.) into GPU memory, and the GPU fetches and renders it directly.
Traditional:
CPU [traverse objects → generate draw calls] → GPU [receive calls → render]

BRG:
CPU [upload instance data to GPU memory] → GPU [fetch data directly → render]
This dramatically reduces the number of CPU-to-GPU round trips, and the GPU can keep working without waiting.
GPU Instancing and Indirect Rendering
The data BRG uploads to GPU memory is in the form of a Structured Buffer — an array of transform data for objects sharing the same mesh, resident in GPU memory. This is literally where the “Resident” in the name comes from.
The actual draw commands are issued via indirect rendering using DrawMeshInstancedIndirect. The “indirect” part means the CPU doesn’t directly specify “draw N instances” — instead, the GPU reads from the buffer and determines the instance count and range itself.
The old Graphics.RenderMeshInstanced() topped out at 1,023 instances per call. GPU Resident Drawer has no such limit. It handles batch splitting internally, so there’s effectively no ceiling on instance count.
GPU Occlusion Culling — Even Culling Moves to the GPU
Culling — excluding objects not visible on screen from the render list — was traditionally a CPU job. GPU Resident Drawer moves this to the GPU as well.
The technique uses the previous frame’s depth buffer:
1. Previous frame finishes rendering → depth buffer is preserved
2. At the start of the current frame, a Compute Shader tests each instance's bounding box against the depth buffer
3. Occluded instances are removed from the draw list
4. Only surviving instances are rendered
The advantage is speed. CPU-based occlusion culling requires ray casting or PVS (Potentially Visible Set) calculations on the CPU side. GPU parallel processing evaluates thousands of instances simultaneously.
There is one caveat though: a one-frame delay. Since culling is based on the previous frame, a very fast camera pan or rotation can produce culling artifacts — an incorrectly excluded object flickering for a single frame. If your game has fast-moving cameras, this is worth testing.
DOTS Instancing — The Shader Requirement
For GPU Resident Drawer to work, the shaders you’re using must support DOTS Instancing. Unity’s built-in URP/HDRP shaders (Lit, Unlit, etc.) already do — but custom shaders need to be checked.
The way DOTS Instancing shaders read instance data differs from traditional GPU Instancing:
// Traditional GPU Instancing
UNITY_INSTANCING_BUFFER_START(Props)
    UNITY_DEFINE_INSTANCED_PROP(float4, _Color)
UNITY_INSTANCING_BUFFER_END(Props)

// DOTS Instancing (BRG approach)
#ifdef UNITY_DOTS_INSTANCING_ENABLED
UNITY_DOTS_INSTANCING_START(MaterialPropertyMetadata)
    UNITY_DOTS_DEFINE_INSTANCED_PROP(float4, _Color)
UNITY_DOTS_INSTANCING_END(MaterialPropertyMetadata)
#endif
Projects that rely heavily on custom shaders should audit shader compatibility before enabling GPU Resident Drawer.
The details are covered in the follow-up post: Custom Shaders and GPU Resident Drawer — DOTS Instancing Complete Guide.
Performance Numbers
Here’s a compelling real-world test case with 35,000 foliage objects:
| Metric | GPU Resident Drawer Off | GPU Resident Drawer On |
|---|---|---|
| Draw Calls | 43,500 | 128 |
| CPU Rendering Load | baseline | ~50% reduction |
| GPU Memory Usage | baseline | +~100MB |
Dropping from 43,000 draw calls to 128 is a striking number. On the other hand, GPU memory increases by around 100MB — the cost of keeping instance data resident in GPU memory shows up directly as memory overhead.
If your project targets low-spec hardware with a tight memory budget, measure before and after with the Profiler before committing to GPU Resident Drawer.
How to Enable (URP)
Three settings need to change:
① Shader Stripping
Project Settings → Graphics → Shader Stripping
– BatchRendererGroup Variants → Keep All
② URP Asset
Select the active URP Asset under Project Settings → Graphics
– SRP Batcher → Enable
– GPU Resident Drawer → Instanced Drawing
③ Universal Renderer
Double-click the renderer in the Renderer List
– Rendering Path → Forward+
Expect longer build times — all BRG shader variants need to be compiled. Editor Play Mode entry is unaffected.
When It Doesn’t Apply
If any of the following apply, the GameObject is automatically excluded from GPU Resident Drawer:
| Exclusion Condition | Reason |
|---|---|
MaterialPropertyBlock API usage |
Requires per-instance CPU callbacks |
OnRenderObject or similar per-instance callbacks |
Same reason |
| Shaders without DOTS Instancing support | Cannot access BRG data |
| Light Probes using Proxy Volume (LPPV) | Conflicts with GPU resident data model |
| Skinned Mesh Renderer | Not yet supported |
The reason LPPV conflicts is that the data flow models are fundamentally incompatible. LPPV requires the CPU to compute, every frame and per instance, which point inside the proxy volume to sample SH (Spherical Harmonics) coefficients from — based on each Renderer’s world position. GPU Resident Drawer uploads instance data to GPU memory once and lets the GPU read it without CPU involvement. The “per-frame, per-instance, CPU-driven GI data injection” that LPPV demands is fundamentally at odds with this GPU-resident model, so BRG excludes those objects.
If you want both lighting quality and GPU Resident Drawer, replace LPPV with baked Light Probes or APV (Adaptive Probe Volumes), which are designed to work with this architecture.
If a specific object isn’t in any of those categories but you still want to exclude it manually, add the Disallow GPU Driven Rendering component to it.
Debugging — Verifying It’s Actually Working
In the Frame Debugger, draw calls grouped under “Hybrid Batch Group” indicate that GPU Resident Drawer is actively processing those objects.

To check GPU occlusion culling, go to Window → Analysis → Rendering Debugger → GPU Resident Drawer tab → enable Occlusion Test Overlay. Objects being culled will be visualized directly in the Scene view.

Conclusion — When to Use It, When Not To
GPU Resident Drawer delivers dramatic results in scenes with many repeated meshes. City backgrounds, forests, crowds — anywhere the same mesh appears at scale is the classic beneficiary.
For scenes heavy on Skinned Meshes (like characters) or objects that need per-instance control via MaterialPropertyBlock, the benefits are harder to realize at this point. In those cases, rather than enabling it globally, consider applying it to specific zones and validating with the Profiler.
→ Next: Custom Shaders and GPU Resident Drawer — A Complete Guide to DOTS Instancing