
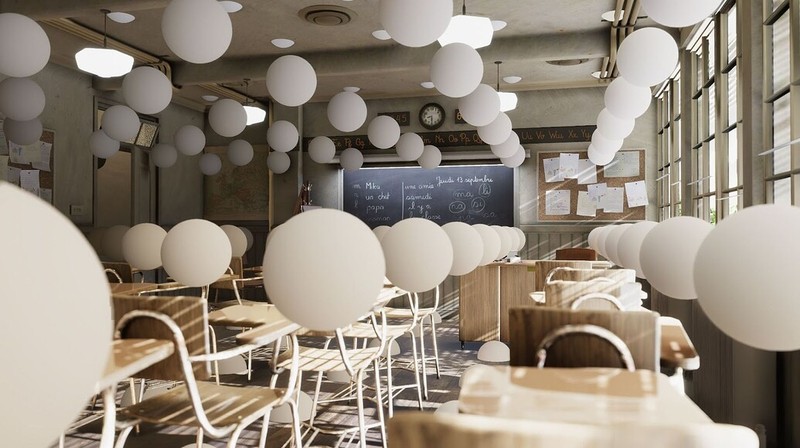
Have you ever found hundreds of Light Probe Groups in your scene lighting the wrong areas? Lighting seams popping at object boundaries, or baked lighting from multiple scenes refusing to blend naturally — forcing you to adjust placements by hand. That’s exactly the problem that Adaptive Probe Volumes (APV) was designed to solve, and it landed in Unity 6 URP as a stable feature.
APV started as an experimental system in HDRP and became production-ready in Unity 6.0 (URP 17). This post breaks down how APV differs from legacy Light Probe Groups, how it works internally, and what changed across Unity 6.0 through 6.3 LTS.
Table of Contents
- The Limits of Light Probe Groups
- APV’s Core Ideas
- How It Works Internally
- Sky Occlusion — Day/Night Transitions
- Lighting Scenarios
- Disk Streaming for Large Worlds
- How to Enable APV (URP)
- When APV Won’t Work
- What Changed — Unity 6.0 to 6.3 LTS
- Debugging — Using the Rendering Debugger
- Conclusion
The Limits of Light Probe Groups — Why a New System Was Needed
The legacy Light Probe Groups (LPG) workflow required developers to manually place Light Probes throughout the scene. Intuitive at small scale, but three structural problems emerge as projects grow.
First, per-object sampling. LPG computes a single blended probe value per object. A large vehicle will receive the same dark value at its roof as at its floor, even if the roof is in direct sunlight. Objects spanning multiple lighting environments produce inaccurate blending.
Second, the limits of manual placement. In scenes with thousands of objects, placing probes correctly around high-variation areas — near windows, inside arches — is essentially manual labor. Imprecise placement leaves visible lighting seams at boundaries.
Third, multi-scene limitations. In large open-world projects with additive scene loading, LPG bake data cannot guarantee lighting continuity across scene boundaries.
APV addresses all three through automation and a structural redesign.
APV’s Core Ideas — Automatic Placement, Brick Structure, Per-Pixel Sampling
APV is built on three pillars: automatic placement, brick structure, and per-pixel sampling.
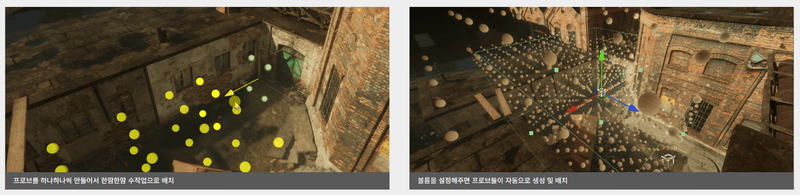
Automatic Placement
With LPG, developers had to walk through the scene placing probes by hand. APV automates this entirely.
Before baking, Unity collects all Mesh Renderers and Terrain objects with Contribute Global Illumination enabled, then analyzes geometry density. Based on this analysis, probes are placed densely in areas with concentrated geometry and sparsely in open space.
To tune density manually, there are two options. Use Override Probe Spacing in the APV Inspector to set min/max spacing globally, or add a local APV volume over a specific area to control its density independently — for example, lowering density over a wide plaza.
Brick Structure
Unity places probes in brick units. Each brick is a 4×4×4 array — 64 Light Probes per brick. Brick size is not fixed; it scales with scene geometry density.
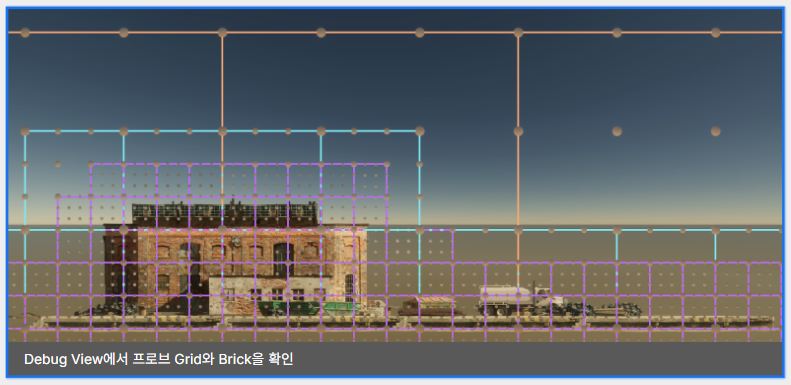
Default brick spacing: 1m / 3m / 9m / 27m (applied hierarchically)

[Dense geometry areas]  → 1m spacing, small bricks → high-resolution lighting
[Open empty spaces]     → 27m spacing, large bricks → memory savings
Areas with high lighting variation — building interiors, window proximity — get small bricks packed tightly. Open terrain under clear sky gets large bricks spaced out.
Per-Pixel Sampling
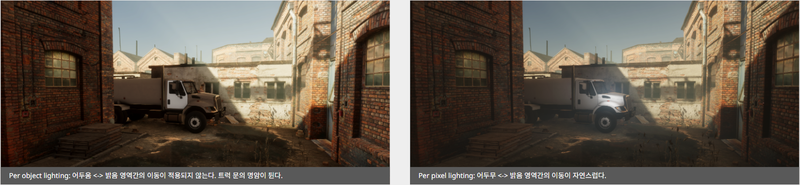
This is the biggest departure from LPG. Instead of one blended probe value per object, APV samples the 8 nearest probes per pixel.
LPG (legacy):
Vehicle → single blended value → roof / hood / floor all receive identical lighting

APV (new):
Vehicle roof pixel  → samples 8 nearby probes → reflects direct sunlight
Vehicle floor pixel → samples 8 nearby probes → reflects ground bounce
The result is natural lighting variation across a single mesh. For volumetric fog, lighting transitions inside the fog volume are also more accurate.
How It Works Internally — From Baking to Runtime Streaming
APV maintains a clear separation between the editor baking phase and the runtime phase.
Baking Phase
APV analyzes scene geometry to determine brick placement, then uses the Progressive GPU Lightmapper to compute SH (Spherical Harmonics) coefficients for each probe position. Results are organized into Baking Sets.
Virtual Offset automatically nudges probes that land inside walls or too close to surfaces outward, reducing artifacts. This is handled automatically.
Runtime Phase
At runtime, APV data moves through four stages:
1. Cell Registration  — Register cells (groups of bricks) into ProbeReferenceVolume
2. Cell Streaming     — Asynchronously load cells nearest to the camera first
3. GPU Data Upload    — Upload cell data in texture-based format to GPU memory
4. Shader Sampling    — Shaders query GI data via the APVResources struct
The central class is the ProbeReferenceVolume singleton, which manages the entire APV system. ProbeBrickPool handles brick data in GPU memory; ProbeBrickIndex manages hierarchical indexing and lookups.
The streaming system prioritizes cells by camera distance and reuses limited GPU memory through a pool. This allows APV datasets larger than available GPU memory to be streamed in chunks at runtime.
Sky Occlusion — Day/Night Transitions from a Single Bake
One of APV’s most compelling features. Sky Occlusion reflects sky color changes from the ambient probe at runtime — all from a single bake. Sun position movement and in-scene light object changes are outside its scope, but for projects where fading the sky brighter or darker is sufficient for a time-of-day effect, it’s an efficient solution.
How It Works
When Sky Occlusion is enabled, Unity bakes an additional sky occlusion value per probe — a static value representing “how much sky light reaches this probe position.”
At runtime, when a GameObject samples a probe, Unity multiplies two values:
Final sky light = sky color (ambient probe, updated dynamically)
               × sky occlusion value (baked static value)
Sky color changes in real time via the ambient probe, but how much of it reaches each point is determined by the baked value. Deep inside a building, sky occlusion is low, so even a bright sky has minimal effect.
Enabling Sky Occlusion and Runtime Setup
Sky Occlusion requires the Progressive GPU Lightmapper. The CPU Lightmapper does not support sky occlusion computation.
Go to Window → Rendering → Lighting → Scene panel → set Lightmapper: Progressive GPU, then enable Sky Occlusion in the APV panel and rebake.
To actually change sky color at runtime, the ambient probe must update dynamically. There are two approaches in URP:
① Gradient / Color Source (recommended)
Window → Rendering → Lighting → Environment panel → Source: Gradient or Color. Changing RenderSettings.ambientSkyColor or animating the color via the Animation window immediately updates the ambient probe.
② Skybox Source (use with caution)
You can keep the Skybox source, but you must manually call DynamicGI.UpdateEnvironment() whenever the skybox changes. This API carries significant performance overhead and is not suitable for per-frame updates like a time-of-day system.
Sky Direction — Directional Sky Light
Basic Sky Occlusion only stores the amount of sky light. When sampling the ambient probe per pixel, the reference direction is the object surface normal — an approximation that breaks down in scenarios where sky light arrives from a specific direction, such as a room with a window or a cave entrance.
Enabling Sky Direction stores the actual direction sky light arrives from at each probe, including bounced light. The visual difference is significant in caves or windowed interior scenes.
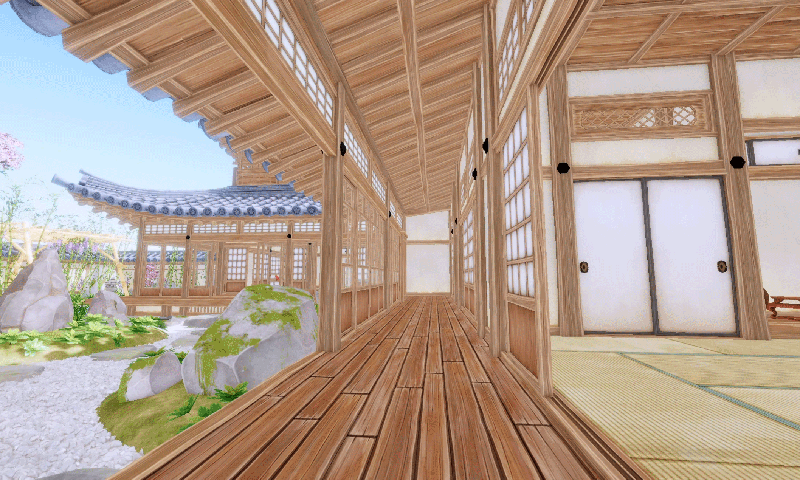
Direction data is not interpolated between probes, so seams may appear at probe boundaries. Add a Probe Adjustment Volume component to specific areas to manually override directions there. Enabling Sky Direction also increases bake time and runtime memory.
Sky Occlusion Limitations
| Constraint | Reason |
|---|---|
| Progressive GPU Lightmapper required | CPU Lightmapper does not support sky occlusion computation |
| Object color ignored | All surfaces treated as opaque grey during baking — dark and bright walls reflect the same amount of light |
| Transparent/translucent objects | Windows and foliage block light rather than transmitting it |
| No interpolation for Sky Direction | Direction data is not interpolated between probes — boundary seams possible |
| Increased bake time and memory | Extra storage cost for sky occlusion values and Sky Direction data |
If your scene has many transparent or translucent objects, the most direct fix is to disable Contribute GI in their Static Editor Flags. To reduce surface color approximation error, adjust the Albedo Override value in the Sky Occlusion Settings panel.
Lighting Scenarios — Handling Complex Lighting Changes
While Sky Occlusion specializes in sky color variation, Lighting Scenarios handle state changes in scene light objects — a lamp turning on or off, a daytime scene shifting to nighttime.
Each Lighting Scenario is a baked APV dataset representing a specific lighting state. Scenarios can be switched at runtime or blended between two states. Lighting Scenario Blending for URP was added in Unity 6.0.
Sky Occlusion vs Lighting Scenarios
| Sky Occlusion | Lighting Scenarios | |
|---|---|---|
| Bake count | Once | Once per scenario |
| Sky color update | Dynamic (real-time) | Dynamic (real-time) |
| In-scene light changes | Not supported | Supported |
| Transition cost | Low (smooth and fast) | Blending cost applies |
| Accuracy | Approximate | High |
The two can be combined: use Sky Occlusion for sky light changes and Lighting Scenarios for interior light state transitions.
Practical guideline: If you only need day/night sky color transitions, Sky Occlusion alone is sufficient. Add Lighting Scenarios when interior light on/off states must also change.
Disk Streaming for Large Worlds
Loading the entire APV dataset into memory at once is impractical for large open worlds. Disk Streaming, added in Unity 6.0, solves this.
When streaming is enabled, APV data is split into cells (groups of bricks) stored on disk. At runtime, only cells within the camera’s view frustum are loaded asynchronously.
By default, APV data is stored in Streaming Assets. Unity 6.0 added the Probe Volume Disable Streaming Assets option, allowing APV data to be stored as regular assets — making it possible to package APV data inside AssetBundles or Addressables for distribution.
Project Settings > Graphics > Pipeline Specific Settings > URP > Adaptive Probe Volumes > Probe Volume Disable Streaming Assets
How to Enable APV (URP)
Three settings are required.
① Change Light Probe System in the URP Asset
Project Settings > Quality → double-click the active URP Asset
Lighting > Light Probe Lighting > Light Probe System → Adaptive Probe Volumes
② Place an APV Object
GameObject > Light > Adaptive Probe Volume
In the Inspector: Mode → Global (covers the entire scene)
③ Configure Object GI Settings
– Objects receiving light: enable Contribute Global Illumination
– Receive Global Illumination → Light Probes
– Scene lights: Light > Mode → Mixed or Baked
After configuration, click Generate Lighting in the Window > Rendering > Lighting panel.
When APV Won’t Work — Constraints and Reasons
Graphics API / Hardware Constraints
Core APV features — runtime streaming, Sky Occlusion baking — rely internally on Compute Shaders. Platforms or graphics APIs that don’t support Compute Shaders cannot run APV.
| Platform / API | Compute Shader | APV Support |
|---|---|---|
| DirectX 11/12 (Shader Model 5.0+) | Full support | Supported |
| Vulkan | Full support | Supported |
| Metal (iOS, macOS) | Full support | Supported |
| OpenGL ES 3.1 (Android) | Supported, but only 4 Compute Buffers guaranteed | Conditionally supported |
| OpenGL ES 3.0 and below | No Compute Shader support | Not supported |
| OpenGL (macOS) | Apple caps at 4.1 → no Compute Shader | Not supported (use Metal) |
| WebGL 2 | No Compute Shader support | Not supported |
| WebGPU (experimental) | Limited Compute Shader support | Not supported (not recommended for production) |
OpenGL ES 3.1 note: The spec only guarantees 4 Compute Buffers. Real devices often support more, but if targeting older low-end Android hardware, check SystemInfo.supportsComputeShaders at runtime.
macOS note: Apple caps OpenGL at version 4.1 on macOS, which disables Compute Shaders via OpenGL. Set the graphics API to Metal to use APV on macOS.
Sky Occlusion additional constraint: Sky Occlusion baking requires the Progressive GPU Lightmapper. On machines with insufficient VRAM, baking falls back to the CPU Lightmapper and Sky Occlusion is disabled.
Scene Structure / Feature Constraints
| Constraint | Reason |
|---|---|
| Cannot use alongside Light Probe Groups | Both systems compete in the same scene, producing unpredictable lighting results |
| No manual probe position editing | Brick-based auto-placement provides no per-probe position editing interface |
| No migration from Light Probe Groups | Fundamentally different data structures — a full rebake is required |
| Transparent objects in Sky Occlusion | All surfaces treated as opaque grey during baking — an approximation with inherent limitations |
| LPPV and GPU Resident Drawer | GPU Resident Drawer keeps instance data on the GPU without CPU involvement, but LPPV must inject per-instance SH coefficients from the CPU every frame — a structural conflict. For APV + GPU Resident Drawer, use APV directly instead of LPPV |
What Changed — Unity 6.0 → 6.3 LTS
| Unity Version | URP Version | Key APV Changes |
|---|---|---|
| 6.0 | URP 17 | Lighting Scenario Blending, Sky Occlusion, Disk Streaming, AssetBundle/Addressables support |
| 6.1 | URP 17.1 | Bicubic Lightmap Sampling, Probe Atlas Blending control added |
| 6.2 | URP 17.2 | Editor memory bug fix in multi-scene environments, explicit WebGL unsupported error, Addressables error messaging improvements |
| 6.3 LTS | URP 17.3 | Additional editor memory and stability fixes |
Unity 6.0 (URP 17) — Core Features Land
This is when APV, previously experimental in HDRP, became the stable, production-ready system for URP. If you ever hit “URP does not support APV” in Unity 2022 LTS, that wall came down in Unity 6.0.
Lighting Scenario Blending, Sky Occlusion, and Disk Streaming all shipped together. Most of APV’s defining features were established in this release.
Unity 6.1 (URP 17.1) — Quality Improvements
Bicubic Lightmap Sampling was added, significantly reducing staircase artifacts from bilinear interpolation in low-resolution lightmaps. Enable it at Project Settings > Graphics > Use Bicubic Lightmap Sampling.
The Probe Atlas Blending property was added, allowing independent control of Reflection Probe atlas blending in the Forward+ renderer.
Unity 6.2 / 6.3 LTS — Stabilization
Both releases focused primarily on bug fixes. The most notable: excessive editor memory growth in multi-scene environments was resolved. If you experienced editor slowdowns in projects with many APV-enabled scenes, upgrading to 6.2 or later should help.
Unity 6.2 also added an explicit build-time error when targeting WebGL with APV enabled. Previously, the failure surfaced as a mid-build error or runtime crash.
Debugging — Using the Rendering Debugger
The primary tool for verifying APV is working correctly is the Rendering Debugger.
Window > Analysis > Rendering Debugger > Probe Volume tab
| Option | What It Shows |
|---|---|
| Display Probes | Visualizes probe positions and stored lighting data |
| Display Bricks | Shows brick boundaries — useful for checking density distribution |
| Display Cells | Shows cell boundaries — the unit used for streaming |
If brick density doesn’t match your intent, use Override Probe Spacing to directly set density for specific areas, or add a Probe Adjustment Volume component to fine-tune problem zones.
Conclusion — When to Use It, When to Think Twice
APV delivers the most value in these scenarios:
- Projects manually placing hundreds of Light Probes across large scenes
- Projects with visible lighting seams at object boundaries
- Time-of-day effects implemented through baked indirect lighting
- Open worlds requiring lighting data too large to fit in memory
Approach these cases with more caution:
- WebGL targets: Not currently supported
- Sky Occlusion + scenes heavy on transparent objects: Approximation error may be visible if window or foliage light transmission is critical
- Very small scenes: Manual LPG placement may be more intuitive and predictable
Steadily refined from Unity 6.0 through 6.3 LTS, APV has established itself as a credible replacement for legacy Light Probe Groups — improving both lighting quality and the authoring workflow.
References
- Unity Manual: Adaptive Probe Volumes (APV) in URP
- Unity Manual: Introduction to Adaptive Probe Volumes
- Unity Manual: Use Adaptive Probe Volumes
- Unity Manual: Update light from the sky at runtime with sky occlusion
- Unity Manual: Bake different lighting setups with Lighting Scenarios
- Unity Manual: Optimize loading Adaptive Probe Volume data (Streaming)
- Unity Manual: What’s new in URP 17 (Unity 6.0)
- Unity Manual: What’s new in URP 17.1 (Unity 6.1)
- Unity Blog: New Ways of Applying Global Illumination in Unity 6
- Unity Manual: Troubleshooting Adaptive Probe Volumes